I’ve fixed enough dripping faucets and sticky doors to know one thing: most home repairs are easier than you think.
You’re probably tired of calling someone for every little thing that goes wrong. Or maybe you’ve been ignoring that loose cabinet handle for months because you’re not sure where to start.
Here’s the truth: you don’t need to be handy to handle basic repairs. You just need someone to show you how without overcomplicating it.
I’ve spent years learning what actually works when something breaks around the house. Not the perfect way. The way that gets it done when you’re standing there with a wrench wondering what’s next.
This guide covers the repairs that come up most often. The ones that cost you money if you ignore them and cost you even more if you call someone every time.
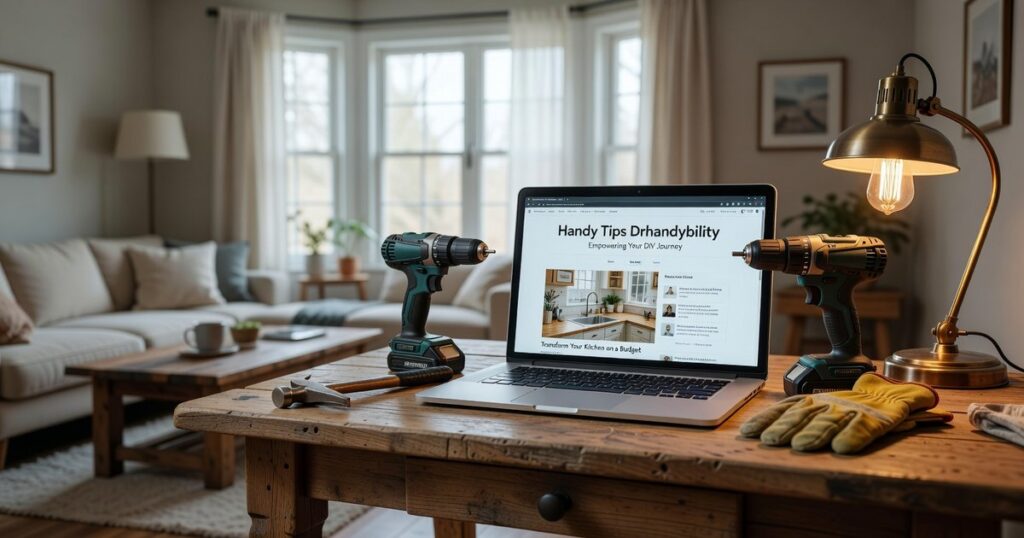
Handy tip from drhandybility: Most home repairs fail because people skip the prep work, not because the fix itself is hard.
You’ll learn how to spot problems before they get worse. How to fix the common stuff yourself. And when it actually makes sense to call in help.
No fancy tools required. No construction experience needed.
Just straightforward steps that work.
The Proactive Maintenance Mindset: Preventing Problems Before They Start
You know what’s worse than spending a Saturday fixing something?
Spending three Saturdays fixing it because you waited too long.
I used to be the person who ignored that weird noise until it became an expensive problem. Now I keep a simple seasonal checklist and honestly, it’s saved me thousands.
Here’s what most people get wrong. They think maintenance means calling someone the second something breaks. But that’s reactive thinking. You’re already behind.
What if you could stop most problems before they even start?
Spring:
- Check gutters and downspouts
- Inspect your AC unit
- Test smoke detectors
Summer:
- Clean your deck or patio
- Check for pests
- Inspect window seals
Fall:
- Get a furnace inspection
- Insulate pipes
- Check for drafts
Winter:
- Monitor for ice dams
- Check your sump pump
- Clean dryer vents
Look, I’m not saying you need to become a maintenance expert overnight. But spending 20 minutes each season on these basics? That’s the difference between a $10 filter change and a $500 HVAC repair call.
And here’s what you’re probably wondering next. What happens when you actually find something wrong during these checks? That’s where having a solid handy tips drhandybility resource comes in. You’ll know whether it’s a quick fix or time to call someone.
The real win isn’t just saving money. It’s knowing your home is taken care of before winter hits or summer heat rolls in.
Your Essential DIY Toolkit: The 10 Tools Every Homeowner Needs
You don’t need a workshop full of equipment.
I learned this the hard way after spending way too much money on tools I used exactly once. (That tile saw is still gathering dust in my garage.)
Here’s what actually happens. According to a 2022 survey by the Home Improvement Research Institute, the average homeowner tackles about 12 repair projects per year. But 73% of those projects require the same basic tools.
Some people argue you should buy specialized tools for every job. They say it’s worth the investment because you’ll get better results.
Maybe. But most of us don’t have the budget or space for that approach.
What I’ve found after years of home repairs is simpler. Ten core tools will handle nearly everything that comes up. The National Association of Home Builders backs this up, noting that basic hand tools and one power tool solve roughly 85% of common household issues.
The Must-Have List:
- Multi-bit screwdriver
- Claw hammer
- Adjustable wrench
- Pliers (needle-nose and channel-lock)
- Tape measure
- Utility knife
- Stud finder
- Level
- Cordless drill
- Safety glasses and gloves
Pro tip: Buy the cordless drill first. Research from Consumer Reports shows it’s the single most-used power tool in American homes.
Start with these. You can always add more later when a specific project calls for it.
For more handy tips drhandybility, check out our guides on choosing quality tools that last.
Quick Fixes for Common Plumbing Annoyances

You know that drip that keeps you up at night?
Or the toilet that won’t stop running and wastes who knows how much water?
I hear about these problems all the time. People think they need to call a plumber and drop $150 for a five-minute fix.
Here’s the truth. Most common plumbing annoyances are things you can handle yourself in less time than it takes to wait for a service call.
Some folks say you should always hire a professional. They worry about making things worse or flooding the bathroom. And sure, there are times when calling someone makes sense (like when you’re dealing with main line issues or gas connections).
But a dripping faucet? A running toilet? Those are different.
Let me walk you through the fixes that actually work.
Silence That Dripping Faucet
Turn off the water supply under the sink first. ALWAYS do this step.
You’ll need an adjustable wrench and a screwdriver. Pop off the handle and remove the packing nut. Nine times out of ten, you’ll find a worn washer or O-ring that costs about 50 cents at the hardware store.
Swap it out. Put everything back together. Done.
Stop a Running Toilet
The flapper vs. the fill valve. That’s your choice here.
Lift the tank lid and flush. If water keeps trickling into the bowl, your flapper is shot. If water keeps filling the tank past the overflow tube, it’s the fill valve.
A new flapper takes maybe 10 minutes to replace. Unhook the old one from the chain and the pegs on the overflow tube. Snap the new one in place.
Fill valve? Slightly longer but still simple. Turn off the water, flush to empty the tank, unscrew the old valve and screw in the new one.
Clear a Slow Drain Without Chemicals
Start with boiling water. Just pour it down slowly.
Still slow? Try the baking soda and vinegar combo (half cup of each). Let it sit for 30 minutes, then flush with hot water.
If that doesn’t work, grab a drain snake. Feed it down until you hit resistance, twist it around and pull out whatever’s blocking things.
Chemical drain cleaners? They work, but they can also eat through old pipes and create toxic fumes. I use them as a LAST resort, not a first option.
These drhandybility handy tips by drhomey save you money and give you confidence to handle the next problem that pops up.
Because there will be a next problem. That’s just how houses work.
Simple Electrical Repairs You Can Safely Tackle
SAFETY FIRST: Turn off the power at the breaker box before you touch anything. Then test with a voltage tester to confirm it’s actually off. This isn’t optional.
I’m not going to sugarcoat this.
Electrical work scares people. And honestly, it should make you a little nervous (that healthy fear keeps you safe).
But some folks think you need an electrician for every single issue. That replacing a light switch requires a professional with years of training and a license.
Here’s where I disagree.
Yes, electrical work can be dangerous. But certain repairs are straightforward enough that you can handle them yourself if you follow the rules. The key is knowing which ones are safe and which ones aren’t.
Replacing a Faulty Light Switch
This is one of the easiest repairs you’ll do. The switch itself costs about three bucks and takes maybe fifteen minutes.
Here’s how it works:
- Turn off power at the breaker box and test with a voltage tester
- Remove the switch plate with a screwdriver
- Take a photo of the wire positions before you disconnect anything
- Unscrew the old switch and disconnect the wires
- Connect the wires to your new switch in the same configuration
- Screw everything back in and replace the plate
The photo step matters more than you think. It’s your insurance policy against forgetting which wire went where.
Updating an Old Outlet
Old outlets wear out. The slots get loose and plugs fall out. Sometimes they just stop working altogether.
Replacing one follows the same basic process as a switch. Power off, test, remove the plate. But outlets have three connections instead of two.
You’ll see a black wire (that’s your hot or line wire), a white wire (neutral), and a bare copper or green wire (ground). Most modern outlets have brass screws for hot wires, silver screws for neutral, and a green screw for ground.
Match them up correctly and you’re good to go. If you’re not sure which wire is which, check out handy tips drhandybility for visual guides that make it clearer.
When to Call a Pro
Now here’s the line you don’t cross.
If you see scorch marks around an outlet or switch, stop. If you smell burning plastic, call someone. If your breakers trip constantly even after you’ve replaced the outlet, that’s a bigger problem than a simple swap can fix.
These signs point to issues in your wiring or electrical panel. That’s not DIY territory anymore.
Mastering Minor Wall Repairs: Patching and Painting
You know those little nail holes that stare at you every time you walk past?
They’re not hard to fix. You just need the right approach.
Fixing Nail Holes and Small Dents
Grab some spackle and a putty knife. Press the spackle into the hole and scrape it smooth with the knife. You want it just slightly raised because it’ll shrink as it dries.
Wait about an hour (check the container for exact times). Then take fine-grit sandpaper and smooth it down until you can’t feel the patch when you run your finger over it.
That’s it for the physical repair.
The Secret to Invisible Touch-Ups
Here’s where most people mess up.
They use whatever paint they have lying around and wonder why the patch screams “I’m here!” from across the room.
Use the original paint if you still have it. Paint changes color as it ages on the wall, so even the same formula from the store won’t match perfectly (though it’s better than nothing).
Now for the technique. Don’t just slap paint on the patched spot. Feather it out. That means blending the edges so there’s no hard line between old and new paint.
Use a small roller if your walls have texture. A brush works for smooth walls but can leave marks on textured surfaces.
Pro tip: Dab the paint on rather than brushing it. This helps match the existing texture better.
For more house advice drhandybility covers everything from quick fixes to full renovations.
From Homeowner to Home Hero
You now have the tools to handle common repairs yourself.
No more panic when something breaks at 9 PM on a Sunday. No more watching your bank account drain because you called someone to tighten a loose faucet.
These skills put you back in control of your home.
I’ve shown you the basics because that’s where real confidence starts. Preventative checks catch problems early. Quick fixes for plumbing and electrical issues save you hundreds. Wall repairs keep your space looking good without the contractor bill.
The best part? Each small win builds your skills for the next challenge.
Here’s what I want you to do this weekend: Pick one task from this guide and complete it. Check your smoke detectors. Fix that slow drain that’s been bugging you for months. Patch that nail hole you’ve been staring at.
Start small but start now.
handy tips drhandybility exists because I believe you’re more capable than you think. Every homeowner can learn these basics and most should.
Your home doesn’t have to feel like a mystery you’re constantly paying others to solve.
Take action on one thing today. You’ll be surprised how good it feels to fix something yourself. Homepage.