Common Causes of Stuck Windows
Stuck windows aren’t just annoying they’re signs something deeper might be going wrong. In older homes, the culprits tend to fall into a few familiar categories.
First, there’s moisture. Humidity and water damage swell wooden window sashes over time, especially if they’ve been left unsealed or painted improperly. Even a small amount of expansion can cause the sash to jam tight against the frame.
Next up is paint layer after stubborn layer. In many vintage homes, windows were painted shut, either on purpose for insulation or simply by neglect. Years of paint buildup along the sash edges and tracks turns functional windows into immovable panels.
Then there’s hardware. Traditional sash systems rely on pulleys, cords, and counterweights. These metal parts rust. Cords fray. And when they break or seize up, windows stop moving. Some older systems just weren’t built for longevity but a little attention can often restore them.
Lastly, consider the bones of the house. As foundations shift over time, the framing around windows can twist just enough to throw off alignment. When frames go out of square, even a well maintained sash can stick.
Knowing the root cause of a jammed window is half the battle and it’ll save you time on repairs that actually fix the issue, not just the symptom.
Quick Diagnostics Before You Start
Before you reach for a tool, zero in on what you’re dealing with. First, figure out which part of the window is stuck. Is it the top sash, the bottom, or both? Entire sash won’t budge? That’s a clue.
Next, identify the style. Single hung windows mean only the bottom sash moves; double hung allows movement in both. Casement windows crank open from the side, while sliders glide horizontally. Each has its own set of sticking points knowing the type saves you time and guesswork.
Look closely for build up. Thick layers of old paint are prime suspects. Warped wood from moisture is a close second. Don’t forget to inspect the hardware: broken cords, rusted pulleys, or bent locks can be the culprits. A fast visual check tells you where to focus and saves you from applying force where finesse is needed.
Tools and Materials You’ll Need
Before you start wrestling with a stuck window, line up your gear. The right tools make the job faster, safer, and a lot less frustrating.
Utility knife or razor blade Your first line of attack for painted shut sashes. Use it to score paint seams cleanly without gouging into the wood.
Pry bar or putty knife Essential for easing the sash loose. A stiff putty knife gets into tight seams; a small pry bar gives you leverage when things get stubborn.
Silicone spray or paraffin wax Once the window moves, these cut friction and help keep it that way. Silicone spray is clean and fast; wax is a classic fix.
Hammer and wood block A gentle tap can break a paint seal or free swollen parts. Always use the wood block to avoid denting the sash.
Heat gun or hairdryer Old paint can be like glue. Apply heat to soften it, especially if scoring and prying aren’t cutting it. Hairdryers work in a pinch just expect a slower warm up.
Safety gloves and eye protection You’re dealing with glass, splinters, old paint, and maybe some flying debris. Gear up before you dig in.
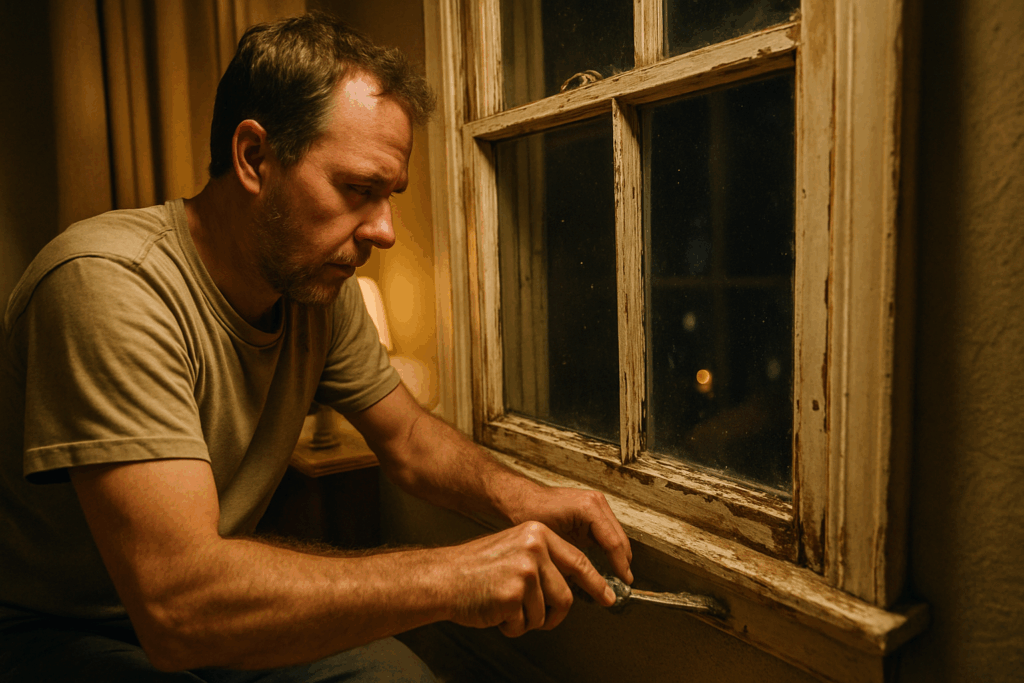
Step by Step: Freeing a Painted Shut Window

Start by scoring the paint lines. Use a sharp utility knife and run it along the edges where the sash meets the frame. Don’t rush this first step cuts through years of layered paint that’s acting like glue. Score along both the inside and outside edges if you can access them.
Next, take a putty knife and carefully wedge it between the sash and frame. You’re not trying to muscle it open all at once. Instead, work your way around the sash a little at a time, gently prying and listening for that satisfying pop of separation.
Still stuck? Place a wood block against the sash and give it light taps with a hammer. The idea isn’t to smash; it’s to create a vibration that cracks the seal. Use short, even taps too much force can damage the sash or frame.
If things are really stubborn, bring in a heat gun. Set it to a moderate temperature and slowly move it along the sealed sections. This softens the old paint without scorching the wood. Keep the nozzle moving lingering in one spot can cause heat damage.
Once the window finally opens, don’t stop there. Sand down any contact points where friction was an issue. Then apply a dry lubricant like silicone spray or paraffin wax along the tracks. This gives the sash a smooth path going forward and helps prevent future stickiness.
Repairing Swollen or Warped Wood
Excess moisture and age related wear can cause wood framed window sashes to swell, making them difficult or even impossible to open. The goal here is to identify swelling and carefully reduce the problem without damaging your window’s structure, especially in historic homes.
Step 1: Inspect for Water Damage or Expansion
Start by examining the window sash and surrounding frame:
Check for soft, spongy areas along the sash edges
Look for discoloration, bubbling paint, or warped surfaces
Take note of recurring condensation or water pooling near windows
If any signs of water damage are present, address underlying moisture issues before continuing with the repair.
Step 2: Reduce Friction with Light Sanding
Minor swelling often results in tighter sash tracks. To ease movement:
Use fine to medium grit sandpaper (120 180 grit)
Lightly sand the areas where the sash drags or meets resistance
Test window movement frequently during the sanding process
Tip: Take your time over sanding can affect window alignment or weaken the sash.
Step 3: Plane Down Edges for Severe Cases
If sanding doesn’t restore full movement:
Use a hand plane or block plane to gently shave down swollen sash edges
Focus only on the contact points that bind during opening and closing
Keep passes shallow and consistent to maintain a flush, even edge
Important: Be extra careful with older or brittle wood to avoid splintering.
Step 4: Seal Bare Wood to Prevent Future Swelling
Once the sash moves freely:
Wipe down the sanded or planed areas to remove dust
Apply a stain blocking or water resistant primer to all exposed wood
Finish with a matching interior paint or sealant as needed
Proper sealing keeps moisture out and preserves the shape of your window sashes long term.
Maintenance and Long Term Prevention
Once your window opens and closes like it should, don’t assume the job’s done for good. Old windows are stubborn, and without regular upkeep, they’ll get sticky again. Here’s how to stay ahead:
When repainting, go easy. Thick coats tend to seal sashes shut. Use painter’s tape, apply thin, even layers, and don’t let paint pool in joints or along edges. It’s not just about looks it’s about movement.
Next, clean the sash tracks and pulleys a few times a year. Dirt and dust build up fast and gum up the works. A quick vacuum followed by a little silicone spray or paraffin wax can make a big difference.
Water is another silent killer. Check that your gutters and drainage systems pull moisture away from windows. Overflowing gutters or dripping eaves can swell frames over time, jamming everything tight.
Finally, inspect the counterweights and cords if you have a weight and pulley sash system. These parts wear down quietly. A frayed cord or missing weight may be the reason a sash won’t budge or won’t stay up. Replacing them is tedious but doable with a little patience and the right gear.
If you’re already tackling interior repairs, see our step by step guide to repairing drywall holes to keep your walls looking clean and polished.
When to Call in a Pro
Some window issues go beyond what sandpaper and silicone spray can fix. If you spot soft, crumbling wood especially at the sill or corners you’re likely dealing with rot. Left alone, it spreads fast and compromises the entire frame. The same goes for signs of insects: tiny holes, sawdust like residue, or the telltale tapping of termites. At that point, it’s not just a stuck sash it’s a structural risk.
Frames that are pulling away from the wall are another red flag. That usually points to shifting foundations or long term water damage undermining the window’s installation. Reinforcing or rehanging a frame isn’t a small job, and band aid fixes won’t hold up.
Finally, if your home has original or historic windows, tread lightly. Don’t force them open or gut them out. These often need specialized restoration to preserve both form and function. A qualified restoration specialist won’t just fix the window they’ll protect the value and integrity of your home.
Bottom line: if you’re seeing damage that goes deeper than paint or swelling, it’s time to bring in someone who knows what they’re doing.
 Ask Ireneia Diamondolls how they got into home repair tips and you'll probably get a longer answer than you expected. The short version: Ireneia started doing it, got genuinely hooked, and at some point realized they had accumulated enough hard-won knowledge that it would be a waste not to share it. So they started writing.
What makes Ireneia worth reading is that they skips the obvious stuff. Nobody needs another surface-level take on Home Repair Tips, Creative Concepts, DIY Renovation Ideas. What readers actually want is the nuance — the part that only becomes clear after you've made a few mistakes and figured out why. That's the territory Ireneia operates in. The writing is direct, occasionally blunt, and always built around what's actually true rather than what sounds good in an article. They has little patience for filler, which means they's pieces tend to be denser with real information than the average post on the same subject.
Ireneia doesn't write to impress anyone. They writes because they has things to say that they genuinely thinks people should hear. That motivation — basic as it sounds — produces something noticeably different from content written for clicks or word count. Readers pick up on it. The comments on Ireneia's work tend to reflect that.
Ask Ireneia Diamondolls how they got into home repair tips and you'll probably get a longer answer than you expected. The short version: Ireneia started doing it, got genuinely hooked, and at some point realized they had accumulated enough hard-won knowledge that it would be a waste not to share it. So they started writing.
What makes Ireneia worth reading is that they skips the obvious stuff. Nobody needs another surface-level take on Home Repair Tips, Creative Concepts, DIY Renovation Ideas. What readers actually want is the nuance — the part that only becomes clear after you've made a few mistakes and figured out why. That's the territory Ireneia operates in. The writing is direct, occasionally blunt, and always built around what's actually true rather than what sounds good in an article. They has little patience for filler, which means they's pieces tend to be denser with real information than the average post on the same subject.
Ireneia doesn't write to impress anyone. They writes because they has things to say that they genuinely thinks people should hear. That motivation — basic as it sounds — produces something noticeably different from content written for clicks or word count. Readers pick up on it. The comments on Ireneia's work tend to reflect that.