Know What You’re Looking At
Before you start twisting pipes or reaching for the wrench, it’s important to correctly identify the issue. A minor leak can be fixed quickly but only if you know what you’re dealing with.
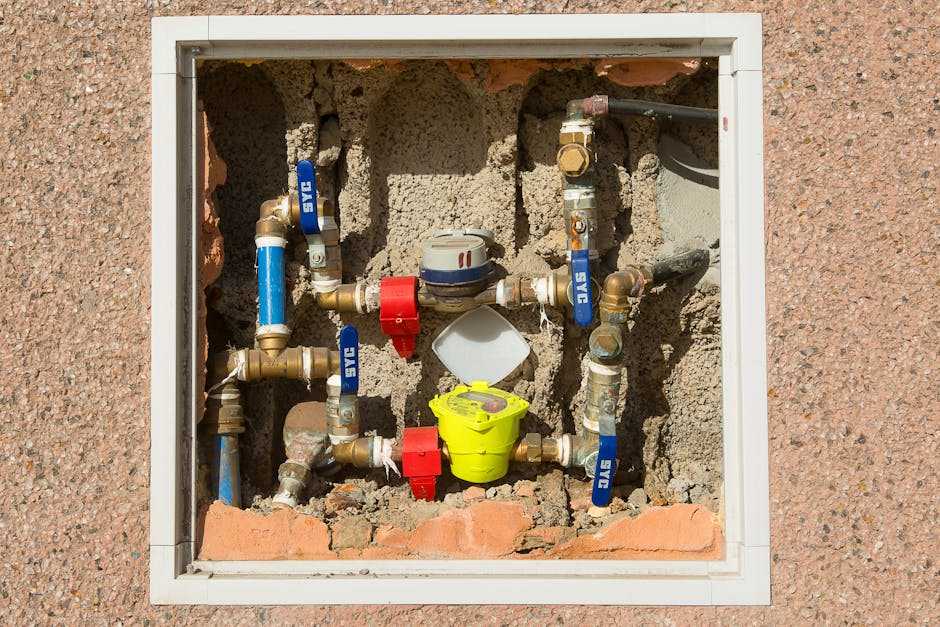
Pinpoint the Source
Leaks can appear in several common areas. Here’s where to look first:
Faucets: Dripping faucets often need a new washer or cartridge.
Under sink pipes: Check the joints and seals on PVC or metal pipes.
Loose fittings: Sometimes leaks occur at the connection points tightening with care can help.
Tip: Place a towel or paper towel under the suspected leak source. Come back after a few hours to see where the dampest spot is.
Minor Leak or Major Problem?
Not all drips are disasters, but know the warning signs.
Minor Leak Indicators:
A steady drip from a faucet or pipe joint
Dampness under a cabinet
Slight discoloration beneath the pipes
Serious Damage Signs:
Pooled water or spreading stains
Musty odors or visible mold
Warped floorboards or peeling paint
If any of the above “serious” signs show up, pause your DIY plans. It might be best to call in a pro.
Tools You’ll Need 90% of the Time
You don’t need a fully stocked tool wall to make a fast repair. Start with these basics:
Adjustable wrench: For tightening or removing fixtures and nuts.
Flathead and Phillips screwdrivers: Useful for disassembling faucet handles and fixtures.
Plumber’s tape (Teflon tape): Great for sealing threaded joints.
Bucket or small container: To catch water from drips or when disconnecting pipes.
Rags or paper towels: For cleanup and checking for leaks.
Optional but helpful: A flashlight or headlamp lets you see into tight spaces with ease.
Getting familiar with your tools and your plumbing setup is the best first step in any DIY repair.
Step by Step: Fixing a Leaky Faucet
Start by shutting off the water. Look under the sink for the shut off valves one for hot, one for cold. Turn them clockwise until they stop. Open the faucet to drain any leftover water and relieve pressure.
Next up: take things apart. Use an adjustable wrench or screwdriver to remove the faucet handle and stem. Once it’s open, look for a washer or O ring usually a small, squishy piece of rubber. If it’s cracked, flattened, or brittle, that’s your leak source. Remove it gently. If it still flexes and holds shape, it might just need a clean.
Now comes the call: replace or reuse? If the washer or O ring looks worn or crusty, throw in a new one. These parts are cheap and easy to find at a hardware store just take the old one with you to match it. A quick rinse in vinegar or a gentle wipe can revive a lightly dirty part, but don’t settle if it’s questionable.
When putting things back together, don’t overtighten. That’s a classic mistake that cracks fittings and seals. Hand tighten, then give an extra quarter turn with a wrench. If you’re using replacement parts, double check they sit flush and snug before reassembling everything.
Last check: turn the water back on slowly and watch the faucet as it runs. No drip? You nailed it.
Step by Step: Sealing a Leak in Pipes
When you’re dealing with threaded pipe connections those spots where two metal pipes screw into each other thread seal tape (commonly known as Teflon tape) is your go to. It works best on clean, dry threads and is ideal for preventing slow leaks in metal or plastic piping. Just wrap the tape snugly around the male threads 2 3 times in a clockwise direction (the same direction you’ll tighten the connection) before screwing it in. No stretching, no doubling back. Keep it clean and tight.
Got a connection that leaks even with tape? Reach for pipe joint compound also called pipe dope. It works better than tape alone on high pressure joints or metal to metal seals. Apply it with a small brush or your finger in a thin layer, just on the male threads. Be neat and sparing so it doesn’t squeeze out all over when tightened.
Short on time or just need a temporary patch? Silicone tape can wrap around a pipe and provide a surprisingly solid seal until you can make a proper fix. It bonds to itself and works well on smaller pinhole leaks. If the leak’s from a visible crack or split, a pipe clamp (with a rubber pad between it and the pipe) can buy you time. Just remember: these are temp fixes. They’ll hold for a bit, but they’re not the end of the story.
Quiet Leaks That Cost You

Not every leak makes a puddle or noise. Some of the most expensive water related problems are the slow, subtle ones that go unnoticed for weeks (or even months). Spotting them early can save you money, prevent water damage, and reduce your risk of mold growth.
Detecting a Silent Toilet Leak
Toilet tank leaks are sneaky. They often happen between the tank and the bowl and are hard to hear or see.
Quick test with food coloring:
Drop 5 10 drops of food coloring into the toilet tank (the back part).
Don’t flush for 30 minutes.
If the color seeps into the bowl, you’ve got a leak.
Common causes:
Worn flapper valve
Improperly seated flush valve
Loose tank bolts
Drips in Crawlspaces or Basements
These are the leaks you don’t notice until your storage boxes are soggy. Basements and crawlspaces often hide small pipe drips, especially during temperature shifts.
How to find them:
Do a visual inspection with a flashlight look for glistening spots on pipes.
Check for signs of moisture near joints or fittings.
Use a dry paper towel over suspected areas to detect active leaks.
Places to look:
Pipe intersections
Water heater connections
Ceiling lines below bathrooms or kitchens
Why Slow Leaks Still Matter
Even if a leak only drips once every few seconds, it adds up fast.
Just one drop per second can waste over 3,000 gallons in a year.
Slow leaks raise humidity, encouraging mold and mildew.
A higher water bill can be the first clue something’s wrong.
Tip: Review your monthly water usage unexpected spikes often trace back to hidden leaks.
Catching these quiet culprits early helps prevent expensive repairs later. A little detective work now can save your home (and budget) later.
Mistakes to Dodge
When tackling minor plumbing leaks as a DIYer, even small missteps can lead to bigger problems. To avoid turning a quick repair into lasting damage, keep an eye out for these common mistakes:
Over Tightening Connections
More pressure doesn’t always mean a better seal. In fact, over tightening fittings or connections can crack washers, strip threads, or damage pipe joints.
Tighten firmly but stop at resistance don’t force it
Use adjustable wrenches with care to avoid crushing parts
Check for leaks after gently tightening rather than overdoing it
Mismatching Pipe Materials
Not all pipes play nice together. Mismatched materials can corrode, leak, or weaken over time.
Don’t mix copper and galvanized steel without a dielectric fitting
Always use compatible connectors based on pipe type
When unsure, consult the labeling or bring a sample to the hardware store
Ignoring Discoloration or Mold Near Leak Spots
A leaking pipe doesn’t just waste water it can also contribute to mold growth and structural damage.
Look for musty smells, warped wood, or bubbling paint
Brown or green discoloration may indicate hidden moisture
Always investigate the surrounding area, even if the leak seems small
Dealing with these issues early can save you from deeper damage and costly repairs down the line. Stay observant and cautious your home will thank you.
When to Call In Reinforcements
Some leaks you just can’t DIY your way out of and that’s okay. If water is showing up inside your walls or dripping from the ceiling, stop right there. You’re likely dealing with a hidden pipe issue or a slow buildup that’s already caused internal damage. Pulling drywall or cutting into ceilings without knowing what you’re doing only adds more problems.
Notice that same spot on the floor getting wet again and again? A leak that keeps coming back after you’re sure you fixed it isn’t just annoying it’s waving a red flag. You might have corrosion, poor pipe alignment, or a break in the system deeper than you can reach.
And if you’ve already tried to fix it yourself twice and it still drips? That’s your cue. It’s not about surrendering, it’s about stopping the drip before it becomes a flood. Professionals know how to spot the source quickly and make repairs that stick. Sometimes the smartest fix is picking up the phone.
Boost Your DIY Confidence
Start with a small but solid plumbing kit. You don’t need a garage full of tools just the essentials: adjustable wrench, plumber’s tape, basin wrench, and a pair of decent pliers. Add some replacement washers, O rings, and a tube of pipe joint compound, and you’re ready for most minor issues.
Next, walk through your home and label the shut off valves. Most folks wait for a leak to find out which knob does what. Don’t be that person. Quick shut offs prevent damage, and knowing your layout adds confidence when it counts.
If the tools still feel a bit foreign, that’s normal. Brush up with this straight shot guide: DIY plumbing repair. Knowing what to use and when means fewer mistakes, less frustration, and fewer weekend emergencies.
 Ask Ireneia Diamondolls how they got into home repair tips and you'll probably get a longer answer than you expected. The short version: Ireneia started doing it, got genuinely hooked, and at some point realized they had accumulated enough hard-won knowledge that it would be a waste not to share it. So they started writing.
What makes Ireneia worth reading is that they skips the obvious stuff. Nobody needs another surface-level take on Home Repair Tips, Creative Concepts, DIY Renovation Ideas. What readers actually want is the nuance — the part that only becomes clear after you've made a few mistakes and figured out why. That's the territory Ireneia operates in. The writing is direct, occasionally blunt, and always built around what's actually true rather than what sounds good in an article. They has little patience for filler, which means they's pieces tend to be denser with real information than the average post on the same subject.
Ireneia doesn't write to impress anyone. They writes because they has things to say that they genuinely thinks people should hear. That motivation — basic as it sounds — produces something noticeably different from content written for clicks or word count. Readers pick up on it. The comments on Ireneia's work tend to reflect that.
Ask Ireneia Diamondolls how they got into home repair tips and you'll probably get a longer answer than you expected. The short version: Ireneia started doing it, got genuinely hooked, and at some point realized they had accumulated enough hard-won knowledge that it would be a waste not to share it. So they started writing.
What makes Ireneia worth reading is that they skips the obvious stuff. Nobody needs another surface-level take on Home Repair Tips, Creative Concepts, DIY Renovation Ideas. What readers actually want is the nuance — the part that only becomes clear after you've made a few mistakes and figured out why. That's the territory Ireneia operates in. The writing is direct, occasionally blunt, and always built around what's actually true rather than what sounds good in an article. They has little patience for filler, which means they's pieces tend to be denser with real information than the average post on the same subject.
Ireneia doesn't write to impress anyone. They writes because they has things to say that they genuinely thinks people should hear. That motivation — basic as it sounds — produces something noticeably different from content written for clicks or word count. Readers pick up on it. The comments on Ireneia's work tend to reflect that.