Introduction
Vlogging has taken plenty of hits—algorithm changes, platform saturation, attention spans shrinking by the second. But it hasn’t folded. Creators adapted. Instead of fighting the tide, many learned to move with it: leaning into quick formats, smarter storytelling, and tighter community building. That resilience matters now more than ever.
2024 brings a new layer of pressure and possibility. Platforms are evolving fast. Viewers are sharper, less forgiving. And AI is changing workflows at a breakneck pace. But here’s the upside: creators who stay nimble, clear in their niche, and smart with their time can win big. This isn’t about being everywhere—it’s about being where your audience is, with content that sticks. Vloggers who catch this wave early won’t just survive—they’ll lead.
Before diving in, make sure your toolbox is stocked.
Don’t make the rookie mistake of starting a fix without the right gear in hand. At minimum, you’ll want a wrench set (adjustable is fine), some pipe tape, a sturdy bucket, a flashlight or headlamp, and a couple of good rags. Keep them all in one place, not scattered across the garage.
And here’s a non-negotiable: before touching any plumbing, shut off the water. Not just to the fixture—trace it back and make sure the main valve is turned off if needed. Water damage moves fast and doesn’t forgive.
Get your gear sorted before your next emergency. For a solid starter list, see 10 Essential Tools Every Homeowner Should Own.
- Diagnosis: Worn Washer or Loose Parts
If your faucet is dripping or leaking, chances are it’s not haunted—it’s just worn out. The usual culprits? A washer or seal that’s past its prime, or internal parts that have come loose over time. This is especially common in older compression-style faucets, where regular wear and tear takes its toll.
- Step-by-Step Fix:
- Turn off the water supply. You don’t need a flood on your hands—look under the sink and shut off those valves.
- Remove the handle and cartridge. Depending on the faucet type, this could involve a set screw or cap. Grab a screwdriver and get to work.
- Replace worn washers or seals. These are usually rubber or silicone and easy to swap. While you’re in there, check for any loose parts and tighten them up.
- Reassemble and test. Piece it back together, turn the water back on, and cross your fingers. If the leak’s gone, you’re golden.
-
When to Replace vs. Repair
If you’ve swapped parts and the drip still won’t die, it might be time to pull the plug on repairs. Fixtures that are heavily corroded or just plain outdated often cost more in time and patches than a full replacement. When in doubt, weigh the price of parts and labor versus a new faucet. Sometimes, it’s just smarter to start fresh. -
Diagnosis: flapper, float, or valve issues
If your toilet won’t stop running or sounds like it’s trying to fill endlessly, the usual suspects are simple: flapper, float, or valve. The flapper might not be sealing right, the float may be set too high, or the fill valve could be worn out. -
Step-by-step fix:
- Lift the tank lid and take a look. Listen for hissing or trickling sounds—they usually point you to the problem.
- If the water level is too high or too low, adjust the float. This may involve twisting a screw or sliding a clip, depending on your setup.
- A warped or dirty flapper is an easy swap—just turn off the water, flush to empty the tank, and unclip the old one.
- If the valve looks corroded or nothing seems to stay fixed, it’s time for a full replacement kit. These come with everything you need, and most installs take under 30 minutes with a wrench and some patience.
- Quiet savings: can slash your water bill
Fixing these small issues doesn’t just bring peace and quiet—it can save hundreds of gallons a month. If your water bill’s creeping up, this is one of the cheapest and most effective places to start.
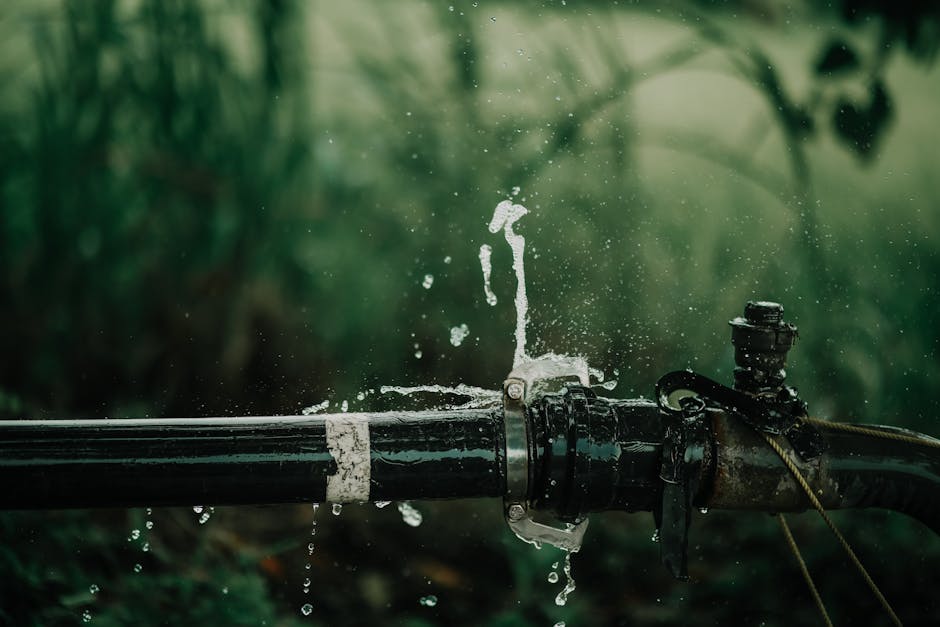
Diagnosis: Loose Connections or Cracked Piping
Sink leaks can be sneaky, but most of the time it’s one of two things: a loose connection or cracked piping—especially around the P-trap. Start by drying everything off, then run water and check for drips. If you see moisture near a joint, it’s probably a loose connection. Cracks are more obvious and may need part replacements.
Step-by-Step Fix:
- Slide a bucket under the P-trap to catch any runoff. You don’t want a mess.
- Unscrew the P-trap by hand or with channel locks. Go slow—most traps are plastic.
- Check for clogs, gunk, or degraded seals. Clean out buildup and inspect washers.
- If the rubber seals are worn or cracked, replace them. Cheap fix, big impact.
- Wrap threaded connections with plumber’s tape before reassembling. This gives you a tighter, leak-resistant fit.
- Tighten the fittings until snug. Stop there. Going too far can crack plastic threads and make things worse than when you started.
A quick check afterward with a paper towel will show you if the fix held. Simple, repeatable, and no plumber’s bill.
Prevent Flood Nightmares: Check Your Washer Hoses
Diagnosing the Problem: Worn or Cracked Hoses
Washer hoses may not be top of mind, but they’re one of the most common—and preventable—causes of household water damage. Over time, hoses can become:
- Cracked or brittle from age and water pressure
- Bulged due to weakening interior lining
- Loosened at the connection points, risking leaks
A quick visual inspection behind your washing machine can reveal early signs of wear and tear.
Step-by-Step Fix: A 10-Minute Prevention Job
Catching this issue early can save thousands in potential water damage. Here’s how to tackle it yourself:
- Unplug the washing machine to ensure safety.
- Turn off the hot and cold water valves connected to the washer.
- Gently pull out the machine to access the hoses without straining them.
- Inspect both hoses thoroughly for any cracks, bulges, or corrosion at the joints.
- If replacing, upgrade to braided stainless steel hoses. They’re more durable and pressure-resistant than standard rubber hoses.
- Reconnect securely and test for any immediate leaks.
Why It Matters
This is a 10-minute task that can prevent flood nightmares. Replacing washer hoses is simple, inexpensive, and crucial to protecting your floors, walls, and appliances from sudden water damage.
Sometimes your showerhead spits uneven jets or barely delivers water at all. Usually, it’s not broken—it’s just gunked up. The three most common culprits? Mineral build-up from hard water, a bad gasket, or worn threads that just won’t seal right.
Here’s the simple fix:
- Unscrew the showerhead from the pipe. Use a wrench if it’s stuck, but wrap the metal with a cloth to avoid scratching it.
- If the openings look clogged, soak the head in white vinegar for a few hours (or overnight) to break down mineral deposits. A quick brush with an old toothbrush helps too.
- While the head’s soaking, check the washer inside. If it’s brittle or missing, replace it. Also take a look at the pipe threads—if they’re worn or loose, wrap them a few times with Teflon tape to get a tight seal.
- Reattach the showerhead, hand-tighten, then turn on the water. That spray pattern should be clean, centered, and even. If not, repeat or consider a new fixture.
No plumber needed, just about 15 minutes and some attention to detail.
Plumbing fails don’t wait for a convenient moment. The best defense? Eyes on everything—monthly. Take five minutes to look under sinks, around toilets, behind appliances. Look for drips, rust, bulges, anything off. It’s low effort, big reward.
Know your shut-off points. That valve under the sink or the main by the curb? When things flood, every second matters. You don’t want to be Googling while water’s pouring into the hallway.
And don’t overlook the small stuff. Washers and seals age out. The rubber hardens, cracks, and before you know it, there’s a slow leak that turns into mold or a rot problem. Swapping them every couple of years is boring, sure—but it keeps you dry and out of debt.
No fancy tools. Just a flashlight, awareness, and a little follow-through.
Leaks that hide inside walls, ceilings, or foundations are in a different league. These aren’t just annoying—they’re structural threats. If you’re hearing dripping but can’t find the source, or if water shows up in odd places long after a so-called fix, you might be dealing with something deeper.
Persistent moisture can lead to mold, warped materials, or sudden pressure drops in your system. Watch for smells that seem musty or “off,” walls that feel soft or bulge out slightly, or unexplained peeling paint.
At this point, it’s not about DIY. These leaks often need thermal imaging, pressure testing, or even targeted demolition to uncover the root issue. Don’t let the slow drip fool you. Left alone, it becomes an expensive repair—and fast.
You don’t need a plumber’s badge or a toolbox the size of a fridge to handle basic leaks. Most minor fixes—dripping taps, loose fittings, worn washers—just need simple tools, a bit of time, and a willingness to get your hands wet. Patch it now, and you dodge the cost of a full-blown repair down the road.
Water waste stacks up fast. A slow leak today is a higher utility bill tomorrow—and potentially mold if you let it slide. The trick is staying vigilant. Notice small drips, changes in pressure, or that weird sound behind a wall? Don’t ignore it. Keep a few essentials—thread tape, adjustable wrench, sealant—and you’ll be prepped for most quick fixes.
Leaks aren’t always dramatic. But if you wait, they get expensive. Catch problems early, act fast, and your future self will thank you.