Lighting doesn’t shout, but it controls the room. Creators often chase upgrades—cameras, lenses, mics—but overlook one of the most critical tools in their setup: lighting. A well-placed key light can add warmth or tension. Soft backlighting can give your vlog a polished, cinematic edge. Harsh top-down lighting? That’s a fast track to looking tired and uninspired.
It’s more than just visibility. Lighting sets the tone. It tells your viewers what to feel without saying a word. Whether you’re aiming for cozy, edgy, or clean and minimal—your lighting delivers the unspoken message first. Functionally, it also helps guide attention and clarity, especially in fast-paced vlogs.
In design, they say lighting is the silent architect. That goes double for vlogging. Light smart, and your content doesn’t just look better—it feels intentional, dialed-in, and worth watching.
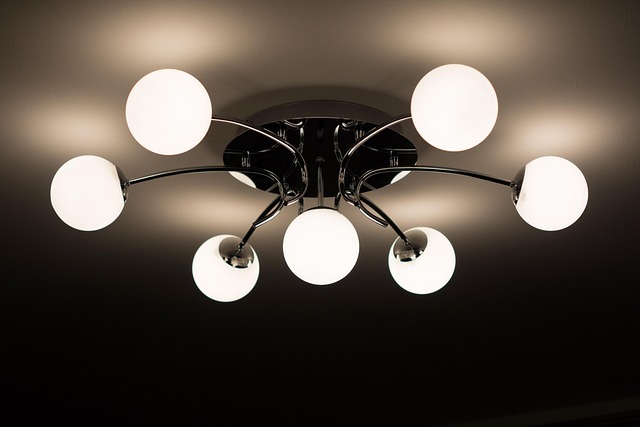
Statement Lighting: When Bold Fixtures Do the Talking
Lighting isn’t just functional anymore—it’s a key design element that sets the tone and elevates any space. In 2024, statement lighting is stepping into the spotlight with bolder shapes, larger scales, and a sculptural presence that instantly transforms a room.
Types of Statement Fixtures
The shift is away from subtle and toward impactful. These are the lighting styles leading the trend:
- Oversized Pendants: Ideal over dining tables or kitchen islands, they provide both illumination and a dramatic focal point.
- Sculptural Chandeliers: Think of these as modern art—hanging from the ceiling. They add a sense of movement, texture, and personality.
- Bold Wall Sconces: Perfect for hallways, bathrooms, or entryways where space is limited but style still matters.
Finding the Right Scale and Shape
Selecting the correct size and silhouette is about more than just taste—it’s about proportion and balance. Here’s how to choose:
- Scale for the Room: In small rooms, an oversized fixture can overwhelm. In spacious, open-plan areas, a too-small piece gets lost.
- Match the Mood: Organic shapes feel soft and calming, while geometric or angular forms make a space feel modern and sharp.
- Think Function + Form: A beautiful fixture still needs to light the room effectively. Consider brightness and placement.
Minimalist or Dramatic? Know When to Choose
Every room doesn’t need a light fixture that screams for attention. The trick is knowing when to dial it up—or down.
-
Go Dramatic:
-
In rooms with a neutral or minimal color palette that need a focal point
-
When you want your light to act as a sculptural centerpiece
-
For spaces where ceilings are high and proportions can handle scale
-
Go Minimalist:
-
In already visually busy spaces where simplicity keeps the look cohesive
-
When layering multiple types of lighting (e.g. track lighting, floor lamps)
-
In smaller spaces where subtlety matters more than show-stopping features
Statement lighting isn’t just about going big—it’s about going bold with intention. Whether you embrace a dramatic piece or keep it quietly refined, let your lighting reflect both your personality and your space’s purpose.
Lighting isn’t just about seeing—it’s about setting a mood, highlighting what matters, and making a space actually work for how you live. To get there, you’ll need all three layers: ambient, task, and accent lighting.
Ambient lighting is your baseline. It’s the general glow that fills the room—what you get from overhead ceiling lights, big floor lamps, or wall-mounted fixtures. It sets the tone and keeps you from bumping into furniture.
Task lighting gets specific. Reading nooks. Kitchen counters. Office desks. It’s focused light made for doing something—chopping, typing, stitching. Think desk lamps, under-cabinet strips, or pendant lights.
Accent lighting is where the style kicks in. It adds depth, drama, and texture, guiding the eye to art, architecture, or whatever you want to show off. Picture LED strips on shelves or a soft spotlight over a painting.
Getting the balance right means thinking in layers, not just wattage. Big room? Go brighter with ambient, but add pockets of task lighting where they’re actually useful. Smaller space? Use dimmers to avoid lighting overload and let accent pieces do the talking.
Quick fixes? Start with smart bulbs and dimmers—instant control without rewiring. Swap harsh white bulbs for warm tones. Add a plug-in wall sconce or clamp light where tasks actually happen. And if all else fails? A good lamp can solve more than you think.
Lighting can make or break a vlog setup. Poor lighting? Your content reads amateur, flat, or worse—forgettable. Pros know this, which is why they’re optimizing their spaces for light, both natural and artificial.
First up: window positioning. If possible, shoot facing a window with diffused natural light—it softens shadows and gives skin a more even tone. Sheer drapes are a simple trick. They cut harsh rays while letting in that flattering daylight glow. Avoid backlighting unless you’re going for silhouette flair (spoiler: you’re probably not).
No good windows? No problem. That’s where smart mirrors and daylight-spectrum LED bulbs come in. Mirrors help bounce available light more evenly across your frame. LEDs that mimic natural daylight (think 5000–6500K) reduce the washed-out look you get from warm yellow bulbs. They also help your camera capture true-to-life color, which matters when editing.
But lighting isn’t just about looks. Light impacts energy and mood. Creating a setup that mimics real daylight can keep you sharper and more energized during long shoots. Plus, it creates a space you actually want to be in, which shows up in your work. Vibrant creators tend to make vibrant content. It’s that simple.
Smart Lighting Is Subtle—but Powerful
Smart lighting isn’t just about flipping switches with your voice—it’s about setting a mood, saving energy, and streamlining your space. Vloggers are leaning into tech like voice-activated systems, dimmers, and automation timers to take control of their setups without breaking flow. Need warm light for a morning chat? One command does it. Want crisp white for a product review? Done, hands-free.
What’s notable is that creators aren’t letting tech overpower their aesthetic. The gear is blending in—under-cabinet strips, hidden uplights, and color temperature presets are all working quietly in the background to elevate the vibe. It’s not gimmicky. It’s practical, low-effort ambiance.
Energy-efficient setups are also helping creators stay mindful of cost and carbon. LED panels with smart scheduling, dusk-to-dawn functions, and motion-sensing lights make a consistent shooting environment more sustainable. It’s efficiency paired with personal style—and that’s where the edge is.
Cove, toe-kick, and under-cabinet lighting aren’t just about visibility—they’re about mood, space, and subtle luxury. These aren’t your flashy neon strips or attention-grabbing fixtures. These are the quiet achievers. A well-placed line of LED along a toe-kick makes your kitchen or studio feel like it’s floating. Light tucked under a cabinet edge adds depth and polish, even without a full renovation.
The magic is in perception. Spaces feel cleaner, warmer, more intentional. It’s the kind of visual trick that makes viewers—or guests—think something major changed, when really it was just smart lighting. And the best part is, these upgrades are low effort. Peel, stick, plug in. No drywall demolition. No rewiring.
For vloggers, especially lifestyle or home creators, these small fixes amplify production value without ballooning overhead. One better-lit shot is sometimes all it takes to change how pro everything looks. Minimal install, maximum effect.
Warm vs. Cool Tones: Where and Why to Use Each
Lighting is more than function—it sets the tone, literally. Warm-toned light (think soft whites and golden hues) brings a sense of calm. It’s the go-to for living rooms, bedrooms, or anywhere you want to relax. Cool tones, on the other hand, lean into blue-white territory. They’re crisp and energizing—ideal for kitchens, bathrooms, or home offices where clarity and focus matter.
Alignment with room function is key. A warm bulb in a workspace makes it feel sleepy. A cool bulb in a bedroom kills the vibe. Always match the light’s temperature to what the room is for.
Then there’s color synchronization. Light temperature can either fight or uplift the colors in your space. Warm lighting plays well with earth tones, terracotta, and creamy neutrals. Cool lighting flatters grays, blues, and minimalist palettes. If you’re working with bold interior colors, check out Top 7 Color Trends for Modern Interiors in 2025 for current color directions that pair seamlessly with both warm and cool setups.
In the end, getting your lighting right isn’t just about mood—it’s about making the space work better for how you live in it.
Use Lighting to Guide the Eye and Define Zones
Lighting isn’t just about brightness—it’s about direction and focus. In a well-designed vlog space, the lighting should do more than eliminate shadows. It should lead the viewer’s eye, set a tone, and break the room into digestible visual zones. Want people to lock onto your face? Light it subtly with a key light and drop the background a stop or two. Have a cool backdrop or shelf full of meaningful objects? Backlight it with a warm hue to add shape and context.
If you’re working with an open floor plan (like most home studios these days), don’t try to light the whole space evenly. That flattens everything out. Instead, spotlight what matters. A desk, a couch, a wall full of art—those become anchors for the viewer. Use floor lamps, softboxes, or even clamp lights to carve out zones without going full Hollywood.
To push the perception of depth, layer your lighting. A three-point setup isn’t just a tutorial cliché—it works. Add separation between foreground and background with rim lights or subtle highlights on walls. Keep it simple, and always test it on camera. The goal isn’t perfect lighting—it’s intentional lighting that makes your content easier to watch and remember.
Plug-in Lighting: Small Touch, Big Shift
Lighting is one of the fastest ways to upgrade a vlogging setup without gutting your wallet—or your walls. Plug-in sconces are the go-to for adding character and controlled light to an otherwise bland backdrop. They require zero wiring, and most mount with basic hardware or removable strips. Perfect if you’re renting or constantly rearranging your shoot space.
Dimmable LED bulbs come next. The ability to tweak brightness on the fly saves you from harsh shadows or overlit skin. Choose warm tones for lifestyle or indoor scenes, cooler whites for tech or product reviews. Keep a couple spare—you’ll use them more than you expect.
Then there’s the quiet MVP: adhesive LED strips. Tape them behind shelves, framing monitors, or under cabinets for that halo effect. Instant ambiance, especially useful for night shoots or setting mood on b-roll.
What’s worth splurging on? Dimmable smart bulbs with remote temperature control—they pay themselves off in mood and flexibility. Skip overpriced branded LED strip kits. The no-name versions from hardware stores or online marketplaces usually pack the same punch for half the cost.
Lighting isn’t one-and-done. It shifts with your space, mood, and message. What lit your room just fine last year might look off now on camera or feel flat during an evening shoot. Don’t treat it as a checkbox—lighting is part of your story.
Start basic: natural light and one good key light can get you far. Then build in layers. Add soft fills, a backlight for depth, or colored LEDs if that’s your vibe. The trick is to test everything. Shoot at night, in cloudy light, with your usual gear. See how it feels—adjust accordingly.
Here’s the bottom line: great vlogs don’t just sound or flow right—they look right. And the first thing people notice? How you’re lit. Get that nailed, and everything else follows.