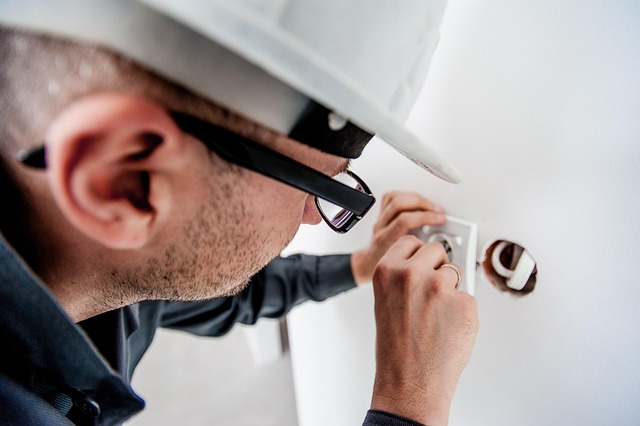
Before you even think about patching or painting, get to know your wall. Is it drywall, plaster, or concrete? Drywall feels soft to the touch and sounds hollow when tapped. Plaster is denser, harder, and may have a slight give. Concrete? Cold, rock-solid, and unforgiving. Figuring this out will steer everything else—what tools to use, what materials you need, and how deep you’ll have to go.
Next, don’t ignore what’s going on behind the surface. Is there moisture? Mold? A mystery stain that could mean a leaking pipe? These aren’t cosmetic issues—they’re silent destroyers. Take the time to inspect carefully. Look for discoloration, soft spots, or that musty smell no air freshener can hide.
Bonus insight: If water damage is involved, don’t just patch it over and hope. You have to stop the source. That means fixing any leaks before you even reach for joint compound. Not sure where to begin? Our no-fluff guide breaks it down: How to Fix Common Plumbing Leaks in Your Home.
Essential Supplies for a Seamless Wall Repair
Before you even think about swinging a paintbrush, make sure your toolbox is stocked. For small to mid-size drywall fixes, you’ll need the basics: patching compound, a solid putty knife, a sanding block, plus primer and paint that match your existing wall color. This is not the time for trial-sized kits or dollar-store tools—they won’t hold up and your wall will show it.
If you’re dealing with bigger holes, you’ll want to step it up with some specialty gear. Mesh patch kits can anchor repairs for medium damage, while larger gaps may need furring strips to frame in the patch before you even reach for compound. Placement and prep matter as much as the patch itself.
And here’s the part too many people try to shrug off: don’t cheap out when it comes to primer or paint. Inferior products show every flaw, every bump, every uneven layer. Spend a bit more on quality and your wall—and whoever walks past it—will thank you later.
Micro-Niching for Loyal, High-Intent Audiences
The mass-market vlogger model is fading. In 2024, it’s not about appealing to everyone—it’s about finding your people. Creators are dialing in on incredibly specific niches, and it’s paying off. Whether it’s vanlife for single dads or deep dives into eco-friendly streetwear, audiences are showing up for content that speaks directly to them.
Smaller but more targeted audiences tend to engage more, stick around longer, and—importantly—convert better. This kind of loyalty is gold. It beats chasing viral trends and offers creators sustainable ways to monetize, whether through merch, sponsorships, or community support platforms.
It takes guts to niche down. But the creators who do it well aren’t just building audiences—they’re building communities. And in the fragmented world of 2024, that’s where the power lies.
Small Nail Holes and Dents
These are quick fixes. Use a lightweight spackling compound—apply it with a putty knife. Just enough to fill the hole or dent. Let it dry, then sand it smooth. No need to overthink it.
Medium Holes (1–6”)
Here, you need structure. Start with a self-adhesive mesh patch or make your own backing using a support like a piece of scrap wood behind the hole. Once secured, layer patching compound on top, feathering it outward to blend. Let dry, sand down, then repeat if needed.
Large Holes or Deep Cracks
This is more than cosmetic. Cut clean edges around the hole to square it off. Fit in a drywall piece or use a full patch kit. Apply compound in layers, letting each one dry fully before sanding. You’ll probably need multiple rounds to get a flush finish. Patience pays off.
Skimping on primer is a fast track to uneven, obvious patchwork. A good primer doesn’t just make paint stick—it helps your patch blend seamlessly into the rest of the wall. It smooths out texture differences, seals new compound, and creates a consistent surface for paint to grab onto.
If you’re working on a wall that’s ever seen water damage—think stains, mildew, or previous leaks—a stain-blocking primer is non-negotiable. Regular primer won’t cut it here. It might hide the discoloration temporarily, but it’ll creep back through in time.
Bottom line: take the extra 10 minutes. Prime everything, even more carefully in spots that catch sunlight or are at eye level. It’s one of those prep steps that pays off in the final look, every time.
Hidden Issues That Call for a Pro
Sometimes, what’s behind the walls matters more than what you see on the surface. When it comes to home repairs and renovations, certain signs indicate that it’s time to call in a professional. DIY fixes may not be enough—and can even make things worse.
Structural Damage or Recurring Cracks
Some cracks might look minor, but repeating patterns or widening over time can signal foundation issues or structural instability.
- Cracks that return after patching may point to underlying movement
- Horizontal cracks in basement walls can be especially serious
- Cracks near windows or doors may suggest shifting frames
In these cases, it’s critical to get a structural assessment to prevent more costly damage down the line.
Water Damage with No Clear Source
Water stains or soft, warped areas in walls or ceilings are more than just cosmetic problems. If you can’t trace the source, the leak might be hidden—and growing worse behind the scenes.
- Discoloration on drywall or ceilings without recent spills or accidents
- Moldy smells or spots despite a clean surface
- Bubbling paint or peeling wallpaper with no clear explanation
Professionals can use moisture meters and thermal imaging to locate and address hidden leaks before they cause major issues.
Crumbling Plaster or Outdated Materials
Older homes often come with vintage charm—and vintage problems. Crumbling plaster, lead paint, or asbestos insulation can present serious safety and handling concerns.
- Soft or brittle walls that disintegrate when touched
- Dusty, cracking ceilings that may contain older materials
- Layers of outdated construction methods that require careful removal
Specialists trained in hazardous material removal or historical preservation are often required to update these areas safely and legally.
When in doubt, play it safe. Ignoring these warning signs can lead to bigger repairs, higher costs, and potential health or safety risks.
Fixing a patch job on a wall isn’t just about slapping on some paint. You’ve got to finesse it. Start by feathering your paint edges well beyond the repaired area—blending is key. If the line is too sharp, you’ll see that patch every time you walk by.
Don’t cut corners with tools either. Cheap brushes shed bristles and rollers leave texture lines. A quality brush or roller is an easy win that gives you cleaner coverage and less frustration.
And honestly, if you want a flawless finish, paint the whole wall. Colors fade over time, and even a perfect match in the can might look off when it dries next to older paint. One fresh coat over the whole surface beats a noticeable touch-up every time.
Once the heavy lifting’s done, don’t rush to call it finished. Step back. Literally. Take a few steps away from what you’ve made and look at it in different lighting—natural light, overhead bulbs, anything that gives you a new perspective. Small flaws often hide until you shift your point of view.
If anything catches your eye—scuffs, uneven coat, blemishes—don’t overthink it. A light sanding and a careful dab of paint goes a long way. These small fixes separate the amateur job from the clean, pro finish.
And before you wrap, clean every tool like you’re going to use it again tomorrow—even if it’s weeks before the next project. Brushes, rollers, and gear that are well-maintained make the next job easier and keep your final results sharp. The work isn’t done until the tools are ready for next time.
Patching and Repainting Like a Pro
Repairing walls or ceilings doesn’t have to be complicated, but it does require the right mindset—and the right steps. Going in with a plan can make all the difference between an amateur fix and a seamless finish.
Stay Methodical
Approach patchwork with intention. Hasty repairs often show through paint or fail to hold up over time.
- Clean the area thoroughly before applying filler
- Use a patching compound suitable for the surface (drywall, plaster, etc.)
- Sand between layers for an even finish
Prep, Tools, and Patience
Quality results come from preparation, not just execution. Investing in the right materials up front saves you time and frustration later.
- Tools to prioritize: Putty knife, sanding block, quality primer, and painter’s tape
- Take your time: Apply in thin layers, letting each coat dry properly
- Don’t rush the paint: Use a primer if needed, and finish with even, deliberate brush or roller strokes
Know When to Patch—And When to Investigate
If you’re covering water damage, always solve the underlying issue before you patch. Painting over problems won’t make them disappear—and could end up costing more.
- Inspect the area for signs of active leaks or moisture
- Only patch once you’re confident the source has been fixed
- Need help stopping a leak first? Learn how here
Even the best-looking walls take a hit over time—scuffs, nail holes, or that mystery dent from moving a couch. Stay ready. Keep leftover paint from your last job labeled and sealed tight. It’s the simplest way to handle small touch-ups without guessing the shade later.
A putty knife and a patch of sandpaper go a long way. Quick repairs don’t need a full toolbox, just the right basics within reach. Knock out dents or dings before they become distractions.
And don’t wait for damage to get obvious. Do a quick walk-through every few months. Look at your walls the way a guest would. The goal isn’t perfection. It’s preventative maintenance. Small touch-ups now beat big fixes later.